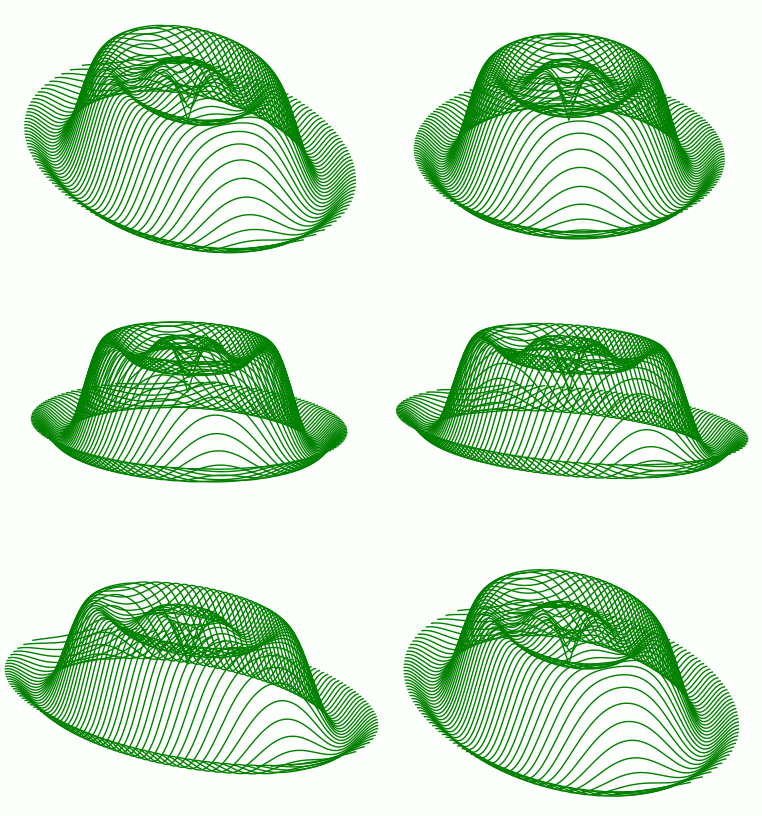

Sinusoidal surfaces of revolution are often used for graphics demonstrations because a concise expression generates an interesting surface. I enjoyed reverse engineering some BASIC code seen in computer hobby magazines from the early 1980s. Python programs that recreate the hat are shared throughout the text below and also collected in this list:
hatCompute.py Compute!, 1981. hatAnalog.py Analog Computing, 1982. hat.py Variable size, 2022. hatSlices3d.py 3d slices, 2024. hat3d.py 3d faces, 2022.
Mike Markowski, mike.ab3ap@gmail.com
April 2024

 |
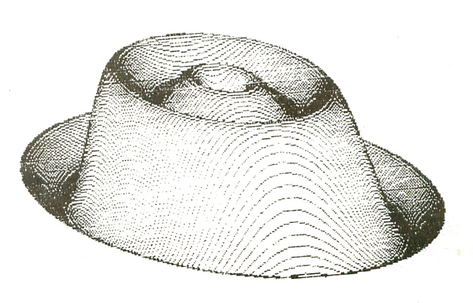 After 3 hours of 1981 runtime! |
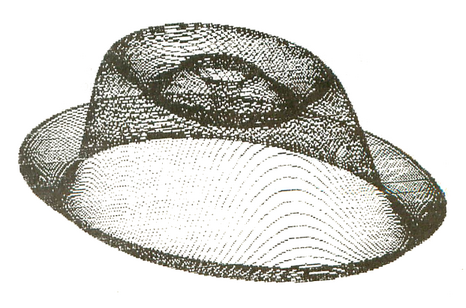 Without hidden line removal |
The program is quickly converted from BASIC to python since few changes are needed, just graphics calls and for loop syntax:
Screen resolution is built into the original code's calculations. With a little effort, it can be generalized to support arbitrary resolution. The original similarly hard-codes 64 slices (actually, 2x64, running from -64 to 63 in steps of 1), but that is made arbitrary, too, in hat.py.
 |
 |
| hat.py | hat.py -s 13 |
Horizontal pixel count creates a larger or smaller hat. To make a hat 800 pixels wide with 2x 32 slices: hat.py -s 32 -w 800
It is also interesting to understand the math. The code is challenging because it is not commented and calculations quietly hard code screen resolution and related hat measurements. The 3d effect is generated by drawing the backmost slice, then the next closer and so on, until the closest slice to the viewer is drawn. Each slice is drawn with a stagger to yield a 3d effect, stretched longer horizontally than vertically because of the 320x200 ratio. This little trick results in the circular hat becoming elliptical, looking like a real hat. It is a contrived view, but since the object cannot be moved the secret is safe from the viewer!
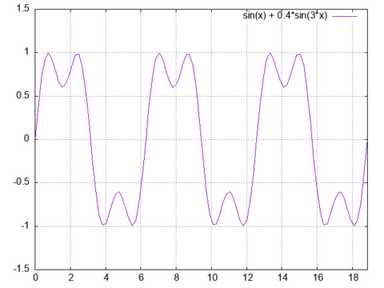
The core of the code is the equation for the surface of revolution, a sum of two sine waves. The sequence of images below go from single sine wave to the final portion of the curve that is used. Imagine it standing vertically and spinning around the left edge, carving out the hat shape in space.
 |
 |
 |
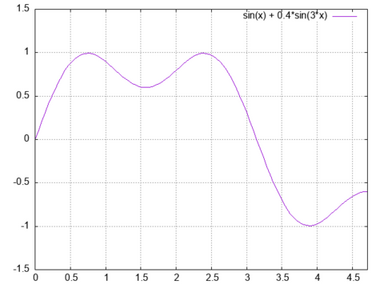 |
| sin(x) | sin(x) + sin(3x) | sin(x) + 0.4 sin(3x) | Portion Used for Hat |
The code does more, however. Surfaces of revolution are usually described in polar coordinates, but the MTU code calculates hat points in Cartesian coordinates on incremental z coordinate values - the vertical, planar slices seen in the 3d image.


The algorithm is:
To understand how the original code implements the algorithm, bring up the MTU ad in a separate window for easy reference. Variables are:
P pixels, half horizontal resolution. Q pixels, half vertical resolution. XP pixels, radius of hat. YP pixels, height of hat. ZP unitless, half number of slices making hat. XR radians, portion of sinusoid period to use for hat. YR fraction of height to use. XF radians/pixel, factor to convert from pixel distance to angle of sinusoid. YF pixels, hat height. ZF unused ZI pixels, loop variable, slice by slice z-coordinate of the current hat slice from -ZP to ZP. ZT pixels, distance some slice is from origin. XL pixels, distance on some slice from vertical axis to edge of hat (see left illustration below). XI pixels, loop variable, point by point x-coordinate of current hat slice from -XL to XL. XT radians, angle to sinusoid based on distance from origin to some point on slice (see right illustration below). YY pixels, height of hat at a given point on slice. X1 pixel, x coord of point on slice with 3d stagger, ZZ==ZI added. Y1 pixel, y coord of point on slice with 3d stagger, ZZ==ZI added.
An easy modernizing code change is to use the slice-creating calculations but graph them with python functions like in this hatSlices3d.py version. The hat can be manipulated with the mouse and reoriented. This is the version used to create the animated image at the top of this page.
We can do still better by ignoring screen resolution and making hat radius and height both a unitless 1. Similarly, a polar grid of radius 1 is constructed and the surface of revolution created. The hat is then scaled using ratios from the original code to give it the same look. The simplified code is found in hat3d.py.
Best of all, 1982 runtime of 3 hours is reduced to 2022 runtime under 2 seconds! What a difference 40 years makes. Notice that the python output below uses faces rather than slices. This would be an uncomfortable hat with a spike shooting down from the center. hatSlices3d.py provides an option to avoid the spike for a more comfortable fit!

Keep your calculator warm with a hat! (HP Prime code here and DM42 code here.)