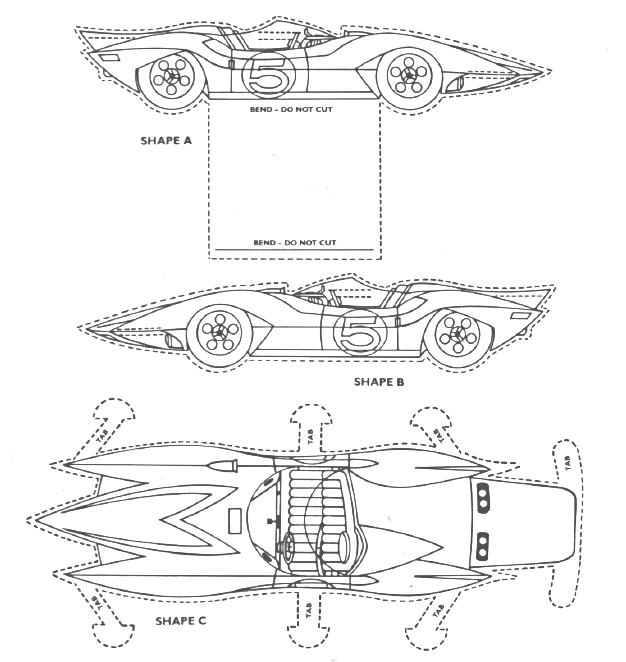
Paper Mach Five
Click on the image above to get a larger version which you can save.
Then print it out and follow the directions below.
I know, what a productive way to spend your time...
The picture you copy was scanned in at 300 dots/inch. (Not that you have
to print it out at that resolution though.)
- Cut out shapes A, B, and C along the outside dotted lines. Cut slots
(inside dotted lines) in shapes A and B.
- Fold all the tabs on shape C inward. Insert tabs in the slots of
shapes shapes A and B from back to front. Back: insert tab into front
into slot from outside car. Secure tab inside with transparent tape.
Front and middle: insert from inside of car, then push tab back through
slot directly below. Secure tab inside with transparent tape.
- Fold the flap on the bottom of shape A on the solid lines as
indicated. Attach the lip of flap to shape B inside and between tires with
transparent tape.
- Tape taillight flap along solid line under car and secure tabs inside
the car with transparent tape.
Now go drive your new car, and in no time you'll see Trixie hovering
overhead in her helicopter!